RadioButton:-
RadioButton is user interface tool kit. A RadioButton give several choice to user but strict to only one selection.RadioButton is generally belong to a group i.e RadioGroup and each group forced to user select one RadioButton.
It is example of change the image on click of RadioButton.In this example.when application start There is initially a white rectangular image in center.
if you click the Red radiobutton the image change to Red rectangular image.
if you click the Blue radiobutton the image change to Blue rect image.
if you click the Green radiobutton the image change to Green rect image.
There is should be
(1)A TextView
(2)Three Radiobutton
(3)A Rectangular Image 50*50
We make it by Graphical Method:By default in Graphical Method it show Icon and Text in pop down menu.We can can select Show only Icon.


Android Resource default screen open and name of the variable and value of col which show in label in Radiobutton.There is three radio label and one a TextView String.
 if you see carefully there is five image in
/res/drawable
blue.png
green.png
ic_launcher.png(default image or icon)
rect.png
red.png
blue.png,green.png,red.png,rect.png These all image is 50*50 pixel you can make by Firework.you have to mention rect.png image in main.xml file by
RadioButton is user interface tool kit. A RadioButton give several choice to user but strict to only one selection.RadioButton is generally belong to a group i.e RadioGroup and each group forced to user select one RadioButton.
Change the Image on Click of Radiobutton:-
It is example of change the image on click of RadioButton.In this example.when application start There is initially a white rectangular image in center.
if you click the Red radiobutton the image change to Red rectangular image.
if you click the Blue radiobutton the image change to Blue rect image.
if you click the Green radiobutton the image change to Green rect image.
 | ||||||||
| Layout of Radiobutton Example |
(1)A TextView
(2)Three Radiobutton
(3)A Rectangular Image 50*50
 | ||||
| Graphic Method |

By drag and drop you make easily layout once you make the main.xml file autogenerated
<?xml version="1.0" encoding="utf-8"?>
<LinearLayout xmlns:android="http://schemas.android.com/apk/res/android"
android:layout_width="fill_parent"
android:layout_height="fill_parent"
android:orientation="vertical" >
<TextView
android:id="@+id/textView1"
android:layout_width="wrap_content"
android:layout_height="wrap_content"
android:text="@string/rc" />
<RadioGroup
android:id="@+id/radioGroup1"
android:layout_width="wrap_content"
android:layout_height="wrap_content" >
<RadioButton
android:id="@+id/radio0"
android:layout_width="wrap_content"
android:layout_height="wrap_content"
android:checked="true"
android:text="@string/col1" />
<RadioButton
android:id="@+id/radio1"
android:layout_width="wrap_content"
android:layout_height="wrap_content"
android:text="@string/col2" />
<RadioButton
android:id="@+id/radio2"
android:layout_width="wrap_content"
android:layout_height="wrap_content"
android:text="@string/col3"
/>
</RadioGroup>
<ImageView
android:id="@+id/imageView1"
android:layout_width="wrap_content"
android:layout_height="wrap_content"
android:src="@drawable/rect"
android:layout_gravity="center"/>
</LinearLayout>
 |
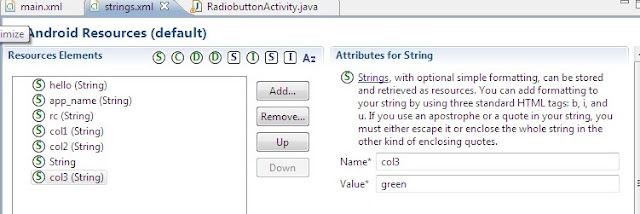
| strings.xml file |
Explanation: Here is Three color label We are using and these label is string resources and they should be define in strings.xml.

This is another alternate method for define the string resources just click Add.. button in the Right Pan and Create a new element at the top Level in Resources dialoge box will be open.just click the String label

Android Resource default screen open and name of the variable and value of col which show in label in Radiobutton.There is three radio label and one a TextView String.

/res/drawable
blue.png
green.png
ic_launcher.png(default image or icon)
rect.png
red.png
blue.png,green.png,red.png,rect.png These all image is 50*50 pixel you can make by Firework.you have to mention rect.png image in main.xml file by
android:src="@drawable/rect" in <ImageView
you must notice one thing that there is no extension is mention rect image name In android there is no distinguish between the image format
rect is our initial image it shown whenever android application run.
Now the Java Source Code
Java Source Code:-
package abh.example.radio;
import android.app.Activity;
import android.os.Bundle;
import android.widget.ImageView;
import android.widget.RadioButton;
import android.widget.RadioGroup;
public class RadiobuttonActivity extends Activity implements RadioGroup.OnCheckedChangeListener
{
RadioGroup rg;
RadioButton r1,r2,r3;
ImageView iv;
public void onCreate(Bundle savedInstanceState) {
super.onCreate(savedInstanceState);
setContentView(R.layout.main);
// This will get the radiogroup
rg=(RadioGroup)findViewById(R.id.radioGroup1);
rg.setOnCheckedChangeListener(this);
iv=(ImageView)findViewById(R.id.imageView1);
//This will get the radiobutton
r1=(RadioButton)findViewById(R.id.radio0);
r2=(RadioButton)findViewById(R.id.radio1);
r3=(RadioButton)findViewById(R.id.radio2);
}
public void onCheckedChanged(RadioGroup rg, int checkedId)
{
switch (checkedId)
{
case R.id.radio0:
iv.setImageResource(R.drawable.red);
break;
case R.id.radio1:
iv.setImageResource(R.drawable.blue);
break;
case R.id.radio2:
iv.setImageResource(R.drawable.green);
break;
}
}
}
Expanation:-
We define OnCheckedChangeListener but we need to wire it to UI element before it come to action.There is two line of code that connect to RadioButton to listen the RadioButton click event
(1) Declaration of RadioGroup in main.xml file
<RadioGroup
android:id="@+id/radioGroup1"
android:layout_width="wrap_content"
android:layout_height="wrap_content" >
(2) rg is RadioGroup variable is connected to setOnCheckedChangeListener(this) by two line of code
rg=(RadioGroup)findViewById(R.id.radioGroup1);
setOnCheckedChangeListener(this)
public void onCheckedChanged(RadioGroup rg, int checkedId)
It is method which takes two parameter RadioGroup and checkedId. RadioGroup tell that which radiobutton is attached the radiogroup and checkedId is Id of the RadioButton which is clicked.
iv.setImageResource(R.drawable.red):-By this method you can change the image with same ImageView variable you need to just change the id of image.
------------------------------------*---------------------------------------------------------
This blog is disseminating valuable information to people who are most concerned of the following issues being targeted by this site. Many certainly will keep coming back to check out updated posts.
ReplyDeleteJohn Wayne Airport Car Rental
thanks robin, yes y are right, this blog to teach android programming for java known person specially for beginner
ReplyDeleteand our team is creating small apps so that we will provide you quality lessons on this topic.
This comment has been removed by the author.
ReplyDelete